Showing posts with label pinterest. Show all posts

Monday, August 12, 2013

Monsters Inc Birthday Party Prep


When Michael said he wanted a "Mike Wazowski" Party, I went straight to Pinterest to find some ideas. I found these cupcakes and knew immediately that I wanted to make them.
I also found these "Sully" cupcakes and thought they would be cute. 

A couple of days before the party, I had to do a little prep for the cupcakes. 
I had to make the eyes

And the mouths 

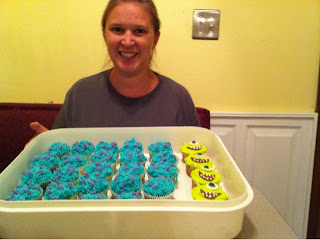
Then the night before the party, I made the cupcakes, decorated and assembled them all. With help from my momma! 


I think they turned out Great! 

So, you want to know how to make them, here you go. 

For the Mike Wazowski cupcakes: 

The eyes are a white candy melt, with blue cookie icing, and a brown mini M&M. That's it. I got the candy melts from hobby lobby and the cookie icing in the baking aisle at the grocery store. Just a note, you don't need that much icing. You can see in the picture of the eye balls, that I started with too much icing, and cut back a lot as I went. 

For the mouths, I used a tootsie roll that I rolled out and cut with a cookie cutter into a mouth shape. For the the teeth, I used the same cookie icing. If I had to do it over again, I would wait till the morning of the party to put the mouth on. Because the tootsie roll got very soggy and started dripping by the next morning. 

The antlers were just slivered almonds, bought in the store that way. 

For the "Sully" cupcakes, we used a "grass" frosting tip. Very simple. 

I am very happy with how both of them turned out. 

Friday, November 30, 2012

Cream Cheese Mints

I found this recipe on Pinterest, and it reminded me of some mints someone made for one of my bridal showers. I made a batch a few weeks ago and they were just like I remembered them. So I made another batch today and thought I would share the recipe on my blog.

They are really easy to make, but time consuming to roll out all of the balls. They are Michael approved, so that means they have to be good.


Here is the recipe and directions:

Homemade Cream Cheese Mints

Yield: 70 U.S. quarter-size mints
Calories per mint: about 10
Note: I typically double this recipe

1 3-ounce package cream cheese, softened
1 teaspoon pure peppermint or mint extract
3 cups powdered sugar, sifted
(Optional) Food coloring


Directions:

Line baking sheets with waxed paper.

In a mixing bowl, with an electric mixer beat together softened cream cheese and peppermint extract.

Note: While creaming the cream cheese is the ideal time to add food coloring to dye the dough.

Add powdered sugar gradually and beat until smooth, kneading in the last of the powdered sugar with hands or a heavy spoon.

Using a 1/2-teaspoon measuring spoon, form mixture into balls the size of a cherry.

Place two rows of dough balls 1/2-inch or so apart, then flatten with a pretty stamp or a fork, like I do. If you'll lay out a couple rows first, by the time you're ready to roll out the third row, the tops of the dough balls are dry enough to flatten easily without having to dip and re-dip the fork in powdered sugar.
Let the mints stand overnight. Every several hours, gently turn them over.

Store in an airtight container.


Sunday, August 26, 2012

Organizing Michael's Artwork

Now that Michael is in a Sunday School class, and not just in the nursery, he comes home every week with some sort of artwork. As a sentimental mom, I would like to keep all of these papers. Just keeping them in a big pile, or a box didn't seem practical. I went to Pinterest for some inspiration, and found this.
Pinned Image
You can find info about this project here
 
Michael obviously isn't in school yet, but it's the same idea as what I was looking for. So, here is what I came up with:

I used my Creative Memories StoryBook Creator program to make the front and the labels. 


 Now, on Sunday's I put the new artwork on the refrigerator and move last weeks into the box.


Once Michael is in school, I will make a different box for all of his school papers. But this works great for right now!

Sunday, February 5, 2012

Canvas storage box

I found this idea on Pinterest, and loved it!

So, last week, I went to JoAnn's and found some cute fabric, so I could make some boxes for Michael's closet. This weekend, I made this cute storage box.
Since This Blog already did a great job with the tutorial, I won't post how I made it. Just follow her steps and you will be good to go.  
The only thing is, I should have got more fabric. In her tutorial, she said she was able to cover the box using 1/2 a yard of fabric. So, I got a whole yard, thinking it would be enough for two boxes and it wasn't. So, now I have to go back and get more for my second box. So, made sure you measure your box first, and measure the fabric you are getting, just to make sure you get enough.
But anyway, I love how it turned out, and I'm thinking about where I could put some more of these. They are great and so practical for storing so much!
I also have to give a big THANK YOU to my Mom, who helped me sew the lining. Thanks Mom, you ROCK!